Please select your Telescope platform.

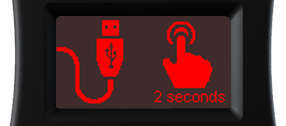
This is the screen you will see depending on what mode you have selected.
Press the M button to cycle through available modes.
(Only modes available are shown)

Move your scope using the Joystick. This screen will show you the motion etc.
See this guide.
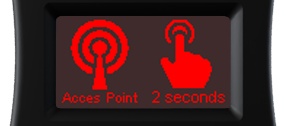
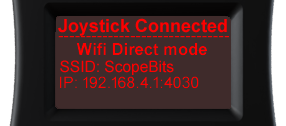
Press the M button for 2 seconds. This mode will create a Wifi network
called "ScopeBits" and assign an IP address 192.168.4.1 & port
4030. Connect to this SSID on your device and start your app such as SkySafari etc.
Example SkySafari guide
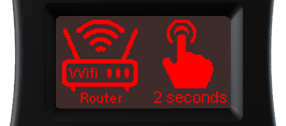
Press the M button for 2 seconds. This mode will create a Wifi network
called "ScopeBits_connect" and assign an IP address 192.168.4.1.
Connect to this SSID on your device and goto the IP 192.168.4.1 in a browser to
continue.
See this guide.
Example SkySafari guide
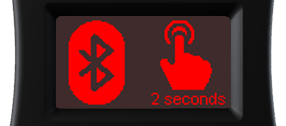
Press the M button for 2 seconds. This mode will create Bluetooth
service called "ScopeBits".
Example SkySafari guide
Press the M button for 2 seconds. This mode will start a USB serial port @9600 baud. You may need to install USB drivers automatically installed on most computers. Connect CONNECTSTAR to a computer using the USB-C cable.

Press the M button for 2 seconds. This will erase the router settings and return to Access Point mode.

Press the M button for 2 seconds. Only available in Router mode.
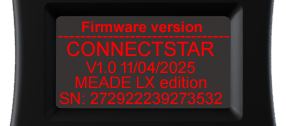
This screen shows firmware + serial number.

This is the screen you will see depending on what mode you have selected.
Press the M button to cycle through available modes.
(Only modes available are shown)
Move your scope using the Joystick. This screen will show you the motion etc.
See this guide.
Press the M button for 2 seconds. This mode will create a Wifi network
called "ScopeBits" and assign an IP address 192.168.4.1 & port
4030. Connect to this SSID on your device and start your app such as SkySafari etc.
Example SkySafari guide
Press the M button for 2 seconds. This mode will create a Wifi network
called "ScopeBits_connect" and assign an IP address 192.168.4.1.
Connect to this SSID on your device and goto the IP 192.168.4.1 in a browser to
continue.
See this guide.
Example SkySafari guide
Press the M button for 2 seconds. This mode will create Bluetooth
service called "ScopeBits".
Example SkySafari guide
Press the M button for 2 seconds. This mode will start a USB serial port @9600 baud. You may need to install USB drivers automatically installed on most computers. Connect CONNECTSTAR to a computer using the USB-C cable. Long press the M button to start the Star Patch update mode.
Press the M button for 2 seconds. This will erase the router settings and return to Access Point mode.
Press the M button for 2 seconds. Only available in Router mode.
This screen shows firmware + serial number.

This is the screen you will see depending on what mode you have selected.
Press the M button to cycle through available modes.
(Only modes available are shown)
Move your scope using the Joystick. This screen will show you the motion etc.
See this guide.
Press the M button for 2 seconds. This mode will create a Wifi network
called "ScopeBits" and assign an IP address 192.168.4.1 & port
4030. Connect to this SSID on your device and start your app such as SkySafari etc.
Example SkySafari guide
Press the M button for 2 seconds. This mode will create a Wifi network
called "ScopeBits_connect" and assign an IP address 192.168.4.1.
Connect to this SSID on your device and goto the IP 192.168.4.1 in a browser to
continue.
See this guide.
Example SkySafari guide
Press the M button for 2 seconds. This mode will create Bluetooth
service called "ScopeBits".
Example SkySafari guide
Press the M button for 2 seconds. This mode will start a USB serial port @9600 baud. You may need to install USB drivers automatically installed on most computers. Connect CONNECTSTAR to a computer using the USB-C cable.
Press the M button for 2 seconds. This will erase the router settings and return to Access Point mode.
Press the M button for 2 seconds. Only available in Router mode.
This screen shows firmware + serial number.
This is the screen you will see depending on what mode you have selected.
Press the M button to cycle through available modes.
(Only modes available are shown)
Move your scope using the Joystick. This screen will show you the motion etc.
See this guide.
Press the M button for 2 seconds. This mode will create a Wifi network
called "ScopeBits" and assign an IP address 192.168.4.1 & port
4030. Connect to this SSID on your device and start your app such as SkySafari etc.
Example SkySafari guide
Press the M button for 2 seconds. This mode will create a Wifi network
called "ScopeBits_connect" and assign an IP address 192.168.4.1.
Connect to this SSID on your device and goto the IP 192.168.4.1 in a browser to
continue.
See this guide.
Example SkySafari guide
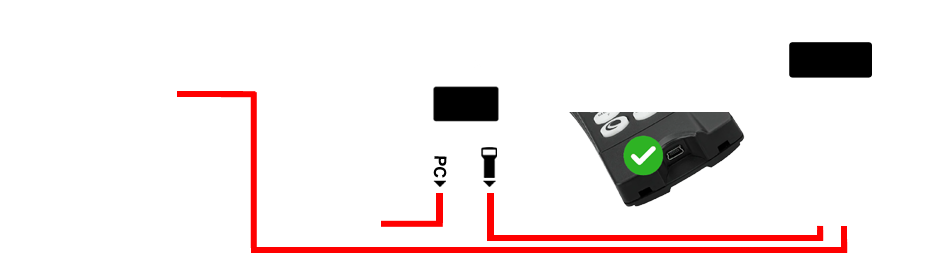
Press the M button for 2 seconds. USB drivers are automatically installed on most computers. Connect CONNECTSTAR to a computer using the USB-C cable into the PC port.
Press the M button for 2 seconds. This will erase the router settings and return to Access Point mode.
Press the M button for 2 seconds. Only available in Router mode.
This screen shows firmware + serial number.
This is the screen you will see depending on what mode you have selected.
Press the M button to cycle through available modes.
(Only modes available are shown)
Move your scope using the Joystick. This screen will show you the motion etc.
See this guide.
Press the M button for 2 seconds. This mode will create a Wifi network
called "ScopeBits" and assign an IP address 192.168.4.1 & port
4030. Connect to this SSID on your device and start your app such as SkySafari etc.
Example SkySafari guide
Press the M button for 2 seconds. This mode will create a Wifi network
called "ScopeBits_connect" and assign an IP address 192.168.4.1.
Connect to this SSID on your device and goto the IP 192.168.4.1 in a browser to
continue.
See this guide.
Example SkySafari guide
Press the M button for 2 seconds. This mode will create Bluetooth service called "ScopeBits".
Press the M button for 2 seconds. This mode will start a USB serial port @9600 baud. You may need to install USB drivers automatically installed on most computers. Connect CONNECTSTAR to a computer using the USB-C cable.
Press the M button for 2 seconds. This will erase the router settings and return to Access Point mode.
Press the M button for 2 seconds. Only available in Router mode.
This screen shows firmware + serial number.
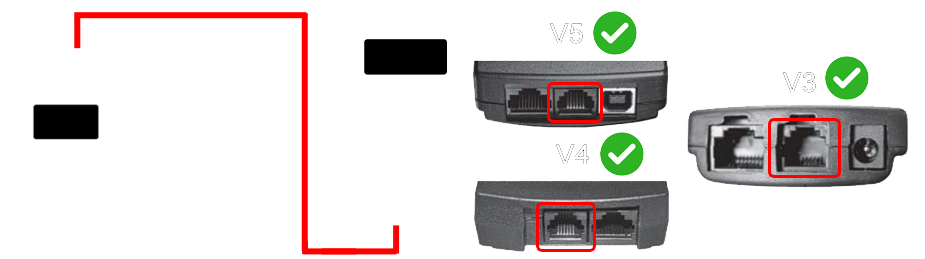
Please be aware, it is always best practice to plug in CONNECTSTAR while the entire unit is powered down. Some telescopes, notably Celestron can have issues with "hot plugging" devices!